Welcome to my blog-I hope you enjoy!
Creepy Altered Spool Book
Art For The Creative Mind altered spool book-theme On The Dark Side.
I used a large vintage spool and a vintage spindle with 3 wood balls for the base. I used vintage ribbon with roses on it, for the pages of the book. Added some vintage words from a book and a few embellishments.
For the top I wrapped wire with crepe paper then added some glitter and the word creepy with using yarn to attach to the wire.
I used an image of Marie and some bat wings to her.
Shabby Chic Tags
Art For The Creative Mind tag swap. We were to create two tags -shabby chic with using some clay element. I used paper clay and used two different stamps, that I push into the clap. Cut around the clay and smooth edges. I let them air dry. Then used a light color brown on them and then use a gold to add dept. Added papers to the tags and then embellished with vintage lace some rhinestone trim and vintage buttons.
A Place For Sweet Treats
A quick and easy project. I found this dish and had this brass candle stick. I painted the candle stick and glued the dis to it.
A few sweets and I have a great serving piece.
A Haunted House
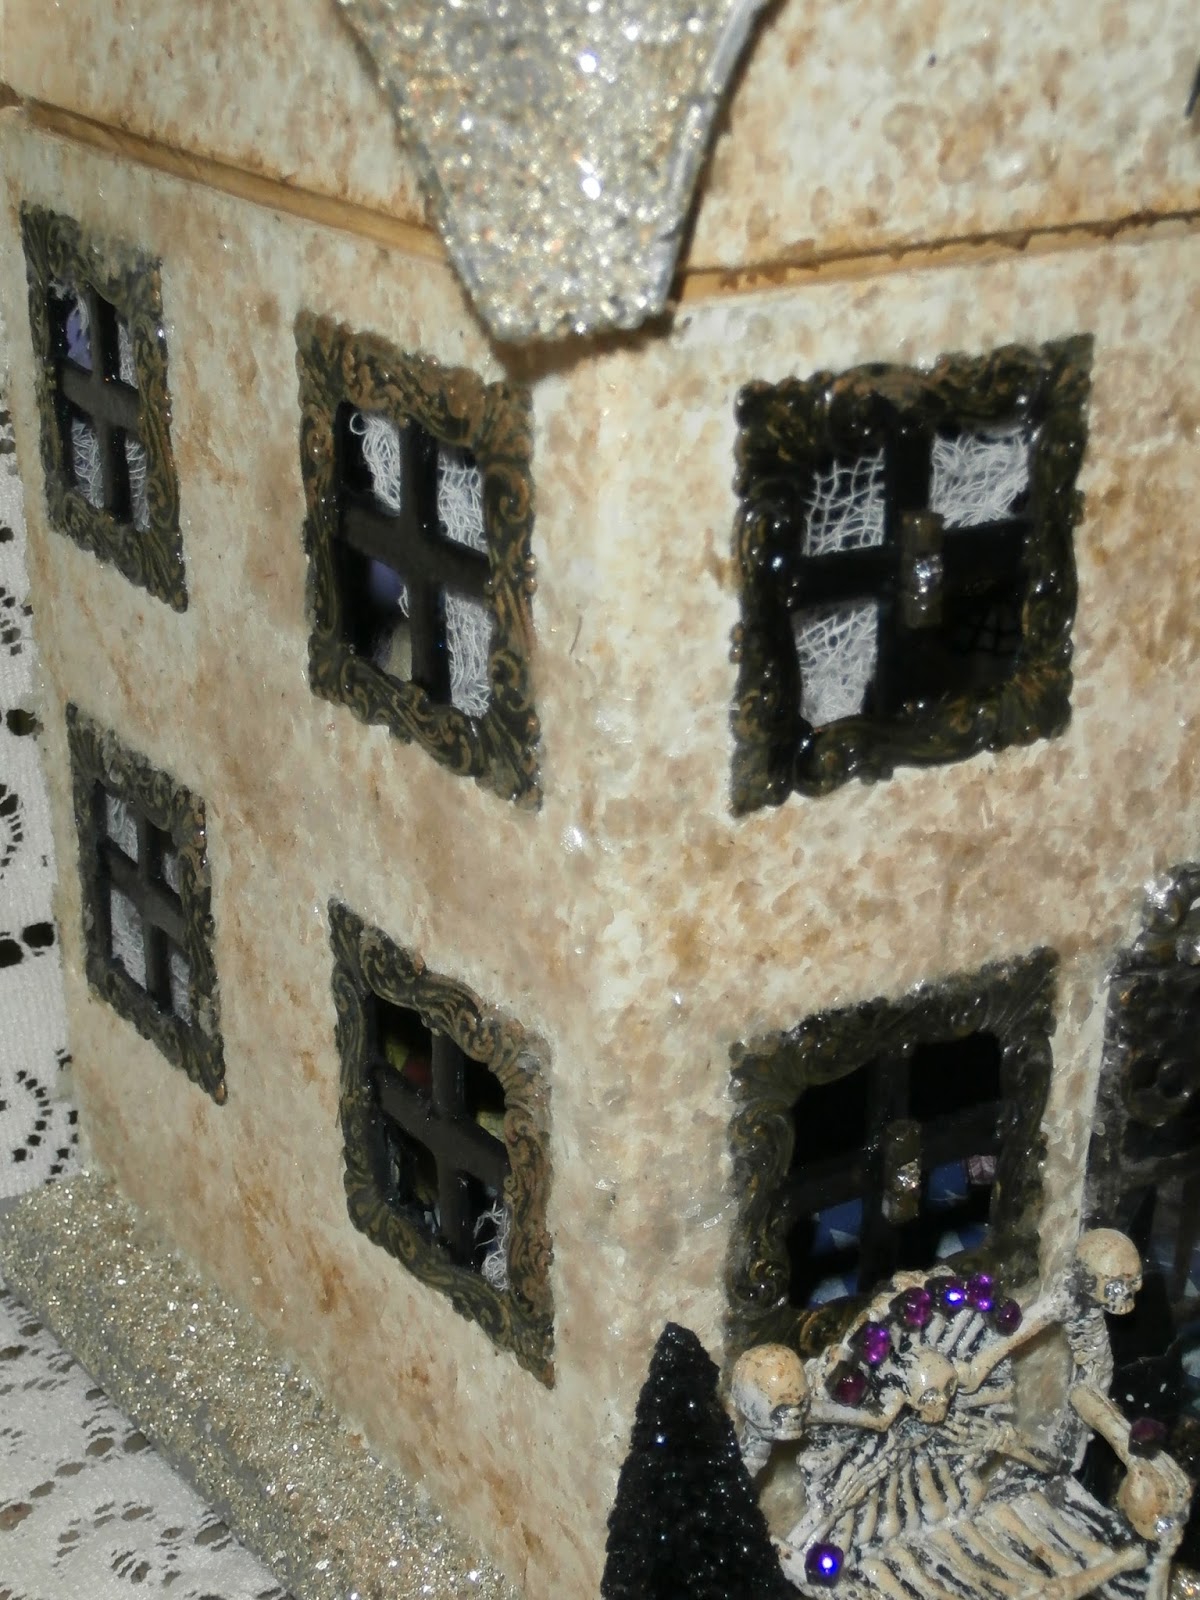
I love this kit from Debbie Hodge. I added the trees, chair, skeleton and all the things inside.
The kit included the house windows, german glass glitter, mica chips, the brass bat and brass findings, the glass framed piece inside the house and the black glitter.
I love creating this piece.
The kit included the house windows, german glass glitter, mica chips, the brass bat and brass findings, the glass framed piece inside the house and the black glitter.
I love creating this piece.
Photo Holders
I used the tops to sugar bowls to make these holders. I used wire and wrapped around the top and then made the swirls at top. Quick and easy.
The West
I had these western pins and decided to use them. So, this is what I came up with.
I had these 4" square shadow boxes, so I added a cowboy image, a little leather and some beads and one of the pins to each.
We have a lot of country around us so hope they sell in our Art League's Holiday House this year.
I had these 4" square shadow boxes, so I added a cowboy image, a little leather and some beads and one of the pins to each.
We have a lot of country around us so hope they sell in our Art League's Holiday House this year.
Small Silver Trays
I found these small silver trays-they are about 6" across. I decided to use them for displays and painted them white.
I added the wooden balls for feet. I think rings and small treasures will look great on them.
Witches Hat
The hat is paper macho-which I painted black and then used german glass glitter. This was a kit from Debbie Hodge. The boo banner is soldier glass with linen inserts. On the hat is soldier glass with a vintage photo, which I added rhinestones around it-with a filagree behind.. I added glass eyes to the skeleton. Added netting for embellishment.
Hat Stand # 3
Another hat stand-I had this very large spool I got from Deb Hodge and decided to make a hat stand with it. The head is covered in hand made paper and sealed.
I added a watch chain with keys
around the neck I wrapped a piece of metal
On the bottom is mare chain and keys-plus a couple of other embellishments. It stands about 27 inches tall.
I added a watch chain with keys
around the neck I wrapped a piece of metal
On the bottom is mare chain and keys-plus a couple of other embellishments. It stands about 27 inches tall.
Hat Stand # 2
Hat Stand
My hat stand. I used a brass candle stick holder for the base (which I sprayed black) and an old kerosene glass base which I added some old vintage pieces inside. I cover the head in tissue paper, added velvet ribbon and a vintage rhinestone bar pin. I added some vintage amber crystal with chain around the base.
Another Cuff
I used a blank cuff-wrapped in leather and wire. I made holes in the shot gun shells and attached to the bracelet.
Cuffs
I made a couple of more cuffs.. Covered the blanks in satin-then added velvet to the front. I used some ribbon with writing on it and then added brass with a few rhinestones.
Marie Shrine
Art For The Creative Mind had an Icon Shrine Swap. I Picked Marie-love her to create with. I used a miniature cabinet I picked up at Good-Will a while back.
I pained the chest and used stencils on the sides and back. Than glazed with gold.
On the inside of the shrine I lined the top, bottom and side with decorated paper. Cut out an arch for the back ground and glued it about an 1/4 of inch from the back. Used an image of Marie which I glued about a 1/4 of inch in front of the arch. I had this cute bird cage-painted and glitter it. Made curtains out of paper out lined in gold. Used to frame the shrine. Added a few details.
I sure hope my swap partner likes her.
Subscribe to:
Comments (Atom)